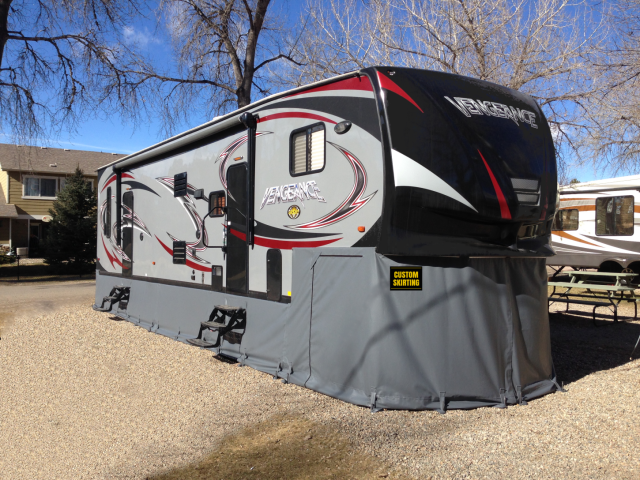
Photo courtesy of Custom Skirting
If you’re parked in Michigan this winter, you know that heavy snowfall, blustery winds, and low temperatures are the norm. But that doesn’t necessarily mean you have to pack the rig away until spring. RV skirting is a great way to insulate your RV and save you from costly heating charges. There are a variety of options out there that can fit every make and model as well as every budget.
There are a few factors you are going to want to take into consideration when deciding which type of skirting you want installed.
- How much money are you willing to invest?
- Are you okay with drilling small holes along the bottom third of your rig?
- Do you want to DIY or hire a professional?
Asking yourself these three questions beforehand will provide guidance for which installation option will best fit your lifestyle. Be sure to contact your campground, park, or resort manager before you make any purchases as there may be skirting requirements.
If the manager allows it, one of the most cost-effective options is simply propping pieces of plywood up around the bottom of your rig – blocking the flow of wind and snow underneath your RV. Although you can find plywood relatively inexpensively and the setup is a breeze, it is not entirely airtight and not the most attractive option.
In most instances, you’ll likely want to go with vinyl panels – a durable, heavyweight fabric that can withstand harsher climates. To determine the appropriate size and length of each panel, you should measure from the ground (make sure your RV is parked on a level surface) to about a third of the way up, usually just above the wheel well. You’ll want to add a couple inches to that measurement so that there is enough slack at the bottom of the panel to be held down by a weight.
If you’re doing the project yourself, you can determine how many panels you want to use. Longer panels will decrease the amount of seams and access points for air, but it will also make accessing under your rig trickier. Regardless of how many panels you go with, you’ll want to make sure you overlap each one by at least three inches.
With your panels set, you’ll now need to decide how you want them attached. If you’re okay with drilling small holes into your RV, you can choose between twist-lock fasteners or snap fasteners. Both of which are durable, sturdy, and can last for many years, but they require you to drill into your rig. And unless you’re confident in your craftsman abilities, you may want to leave a job like that to the professionals.
Some less permanent fixture options range from adhesive studs, adhesive Velcro, and suction cups. When applied correctly, to a clean surface, they should withstand the winter season.
Be sure to measure around any outdoor storage compartments, staircases, electrical and plumbing pipes. Consider adding zippers to your panels for easier access, too. If you have a fifth-wheel, you can extend the skirting to fit around the King Pin, giving you a space for storing larger items, such as outdoor furniture.
With the few extra inches you left at the bottom of your panels, you can create a pocket to insert a piece of wood or PVC pipe to keep them weighted to the ground. Or you can simply fold the fabric in, facing the RV, and put heavy objects on the corners.
Have you ever used skirting on your RV? Share your advice and installation tips to our Facebook page!