Manage your MARVAC member page information
How to manage your images on the MARVAC consumer site
Once your member features and descriptions have been updated, you can then upload images to your page:
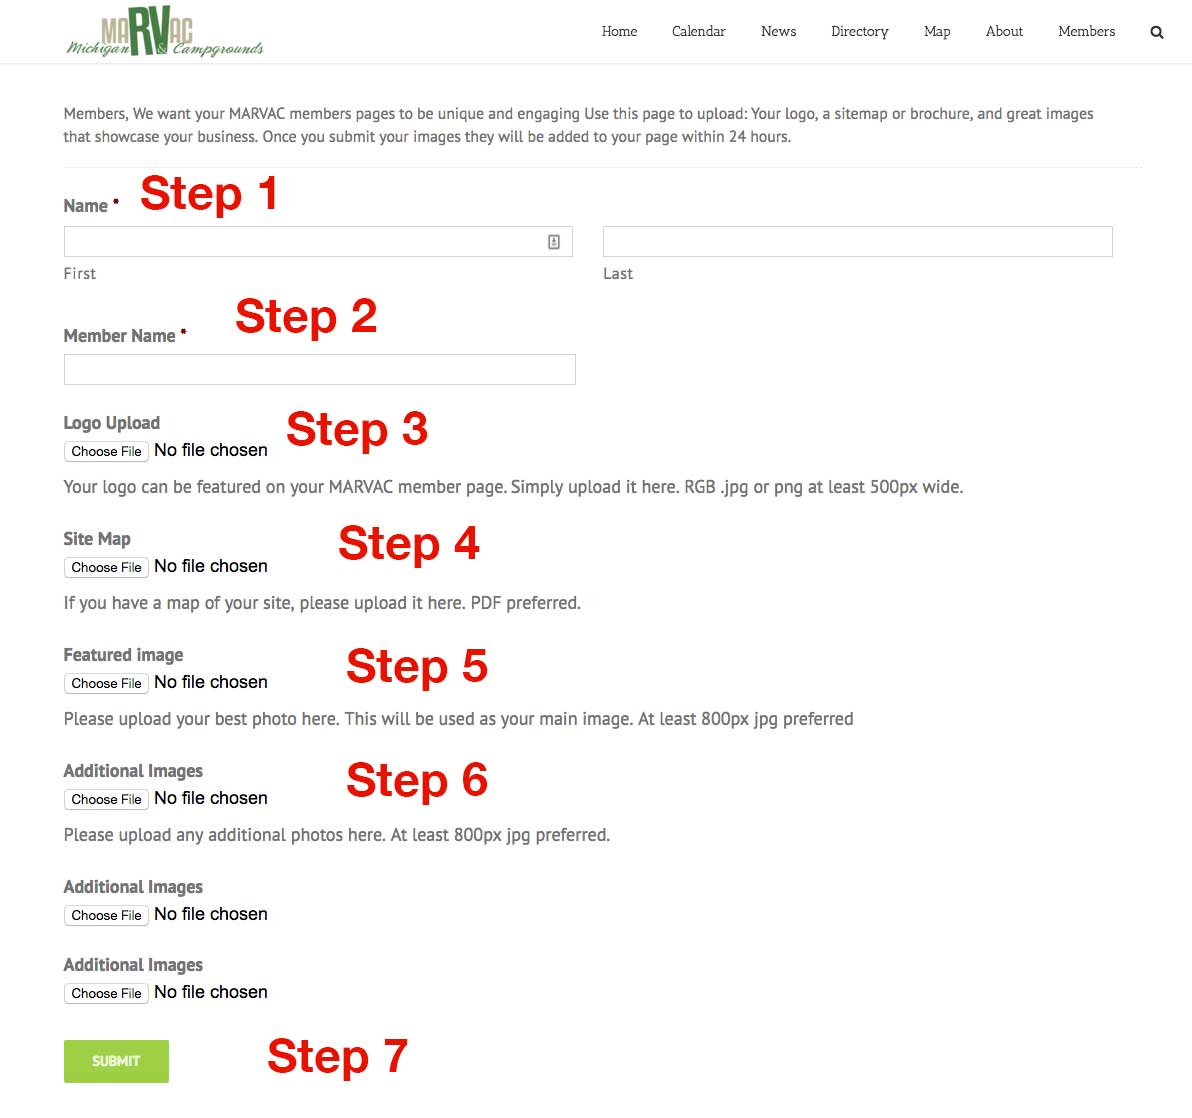
- Enter your first and last name in the boxes under Name.
- Enter your MARVAC registered business in the box titled Member Name.
- Upload your company logo by clicking the button Choose File under Logo Update.
- If you’re a MARVAC Campground member, upload your site map by clicking Choose File under Site Map.
- Select a great image of your business or the surrounding area to be the main featured image when consumers visit your page by clicking Choose File under Featured Image.
- Add any additional images to show off your business by clicking Choose File under Additional Images, (you can do this up to three times).
- Once you have successfully uploaded your logo, site map (if applicable), and your images, click Submit.
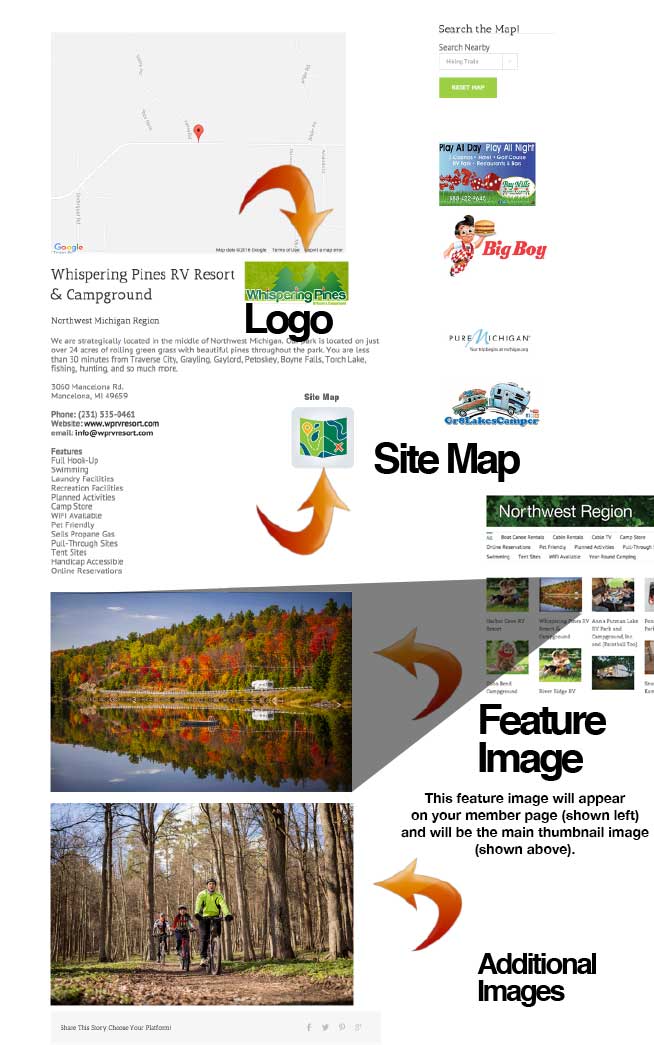
Here is an example of what your page could look like after you’ve uploaded your images.
* Changes are subject to an up to 24-hour activation delay
Need assistance? Click here